
Clever chess tactics that were not what they seemed
In round 3 of the current 6-round Pittsburgh Chess Club Tuesday night tournament, I played a very tense game that led to an unusual position with beautiful tactical possibilities. My opponent, Melih, is a strong player who is a winner of the 2015 Pittsburgh Chess Club Championship earlier this year, and had won the last two tournament games we have played, so I came into this game anxious and also thirsty for revenge.
The game proved to be very challenging for both of us. I achieved a better position out of the opening as Black but was too cautious to press more aggressively. After more than 3 hours (!) of play, we ended up in a simplified late middlegame in which I had only a small but clear advantage. We were both clearly physically and mentally exhausted, and starting to run out of time (these tournament games have a time control of 2 hours per person with a 5-second delay per move). It was up to me to try to find a way to win by inducing errors in his play.
Get ready to be quizzed!
What ended up happening was in retrospect both remarkable and comic. To maximize your entertainment as well as challenge your tactical skills, I recommend pausing at each diagrammed position below in order to ask yourself what move you would play, and why, before gradually uncovering the whole story.
Note: an interactive chess board with all variations is provided at the end of this article.
First, assess a quiet-looking starting position
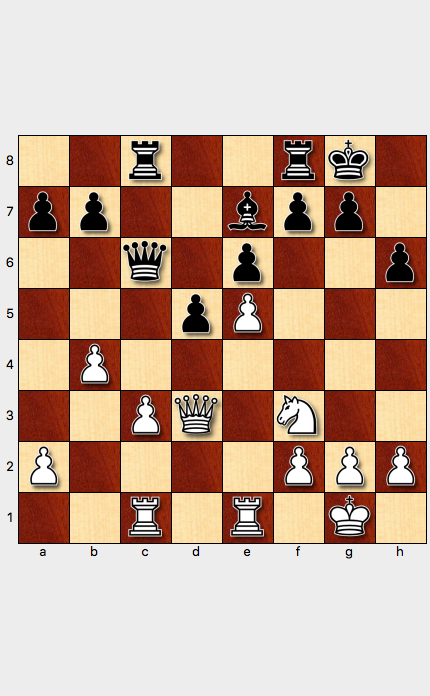
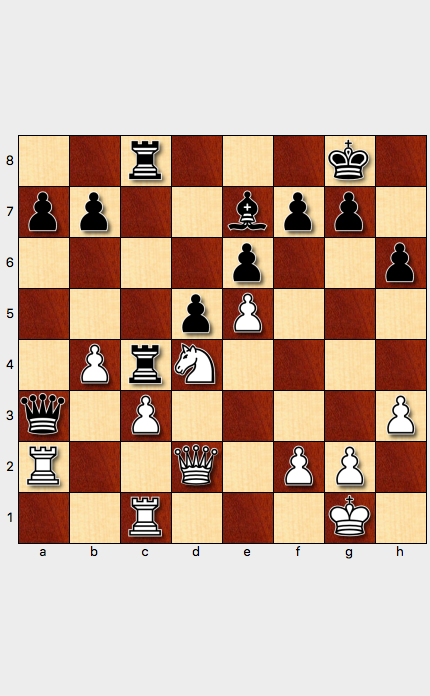
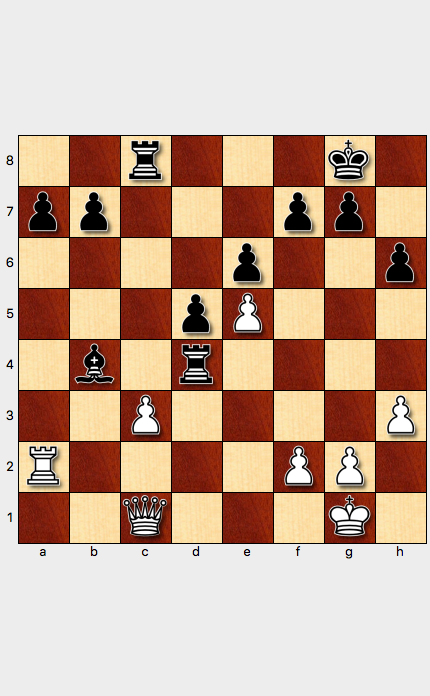
For context, here is the position after 21 moves, after Black played 21…Qc6.
Questions
- What opening do you think this middlegame came from?
- Who stands better and why?
- What is White’s best plan, and what is Black’s best plan?
Answers
Congratulations if you guessed this was a French Defense, Advance Variation, gone totally wrong for White!
Black stands better and has a simple plan:
- attack White’s backward Pawn on c3 on the half-open file, and perhaps also the e5 Pawn as well; and the a2 Pawn and b4 Pawn are also potential targets
- use the half-open c-file for the Rooks, and the dark-squared Bishop against White’s Pawns, and get the Queen involved as well
- using these attacks, overload White’s defenses somehow in order to win at least one of those Pawns to enter a probably winning endgame
White’s only possible counter-plan:
- defend the weak Queen side Pawns
- maybe plant the Knight on a good outpost such as d4
- defend the Pawn on e5 with maybe an f4 advance, and hope to attack Black’s King side with perhaps an f5 break
Progress after seven moves?
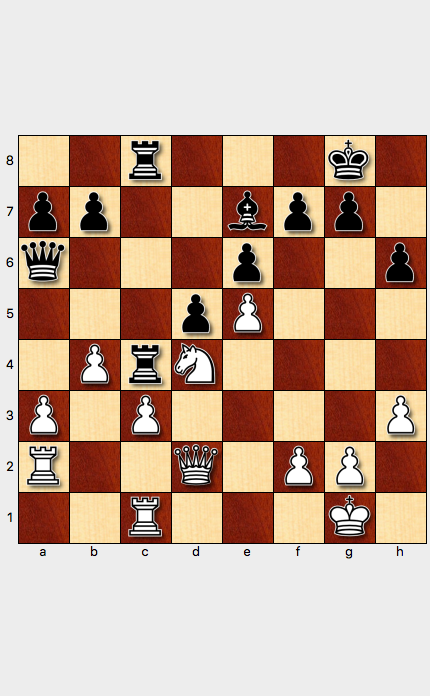
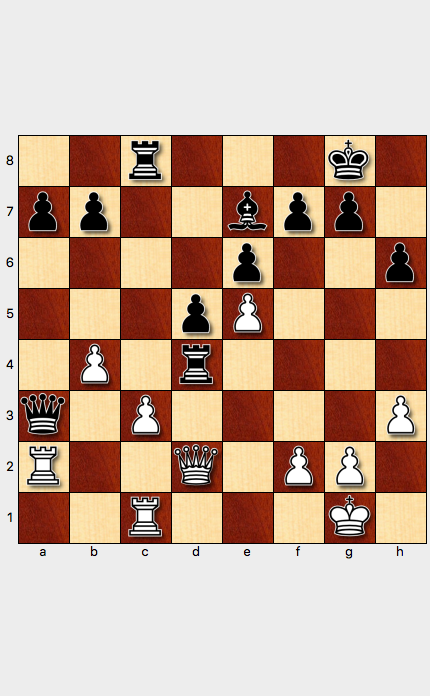
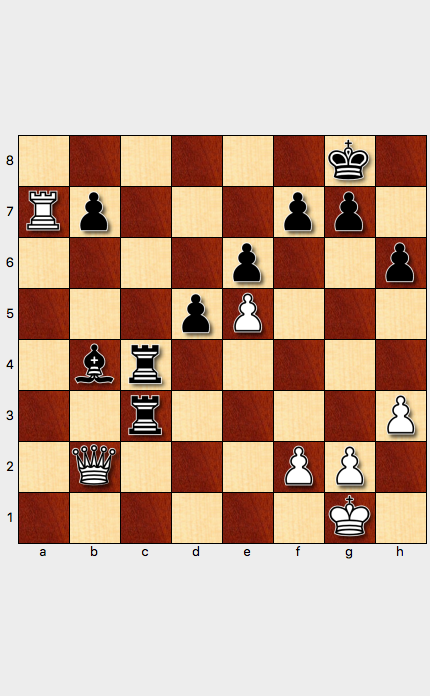
Black has just played 28…Rc4.
Questions
- Who has made more progress in the last seven moves: White or Black?
- What is the nature of the progress made?
Answers
White has played to wait to see what Black is up to; meanwhile, Black has made some progress on the Queen side by:
- doubling Rooks on the half-open c-file
- using the Queen to bear down on White’s a-Pawn, which White has (mistakenly) advanced to a3.
White played a surprising move
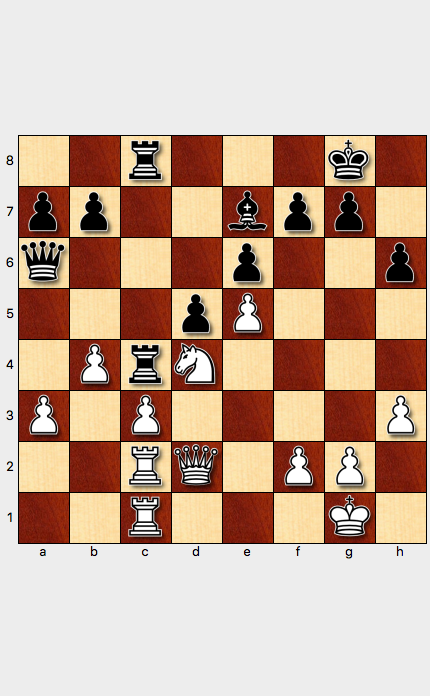
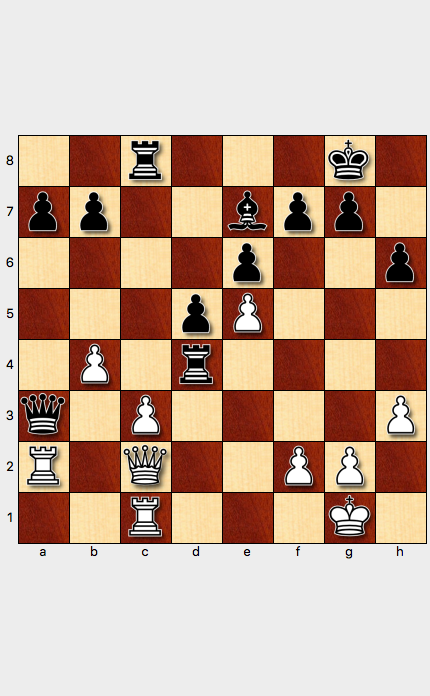
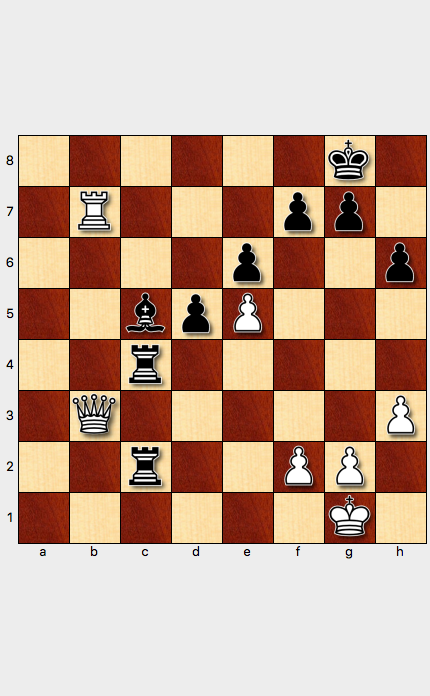
White has just played 29 Rac2.
Questions
On the 29th move, White moved the Rook from a2 to c2, leaving the defense of the a3 Pawn.
- What is the meaning of this strange move?!
- Can Black just take the Pawn with the Queen?
Answers
You may be thinking “White is provocatively setting a trap for Black to fall into”. You get credit if you can see the trap.
Black fell into a trap?
I played 29…Qxa3.
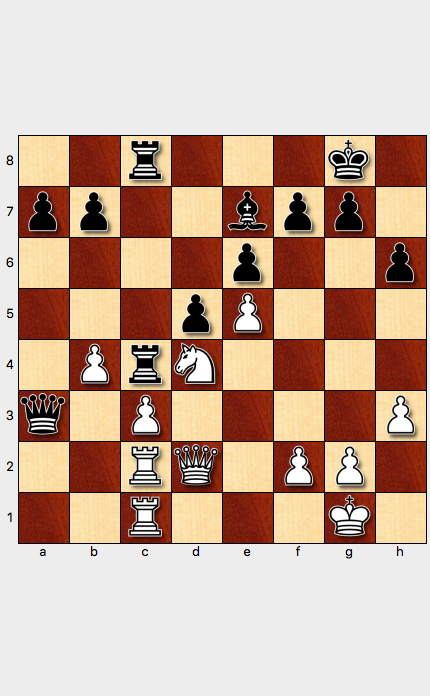
But wait, I took the Pawn! Did I fall into a trap?
Questions
- What is the trap you saw earlier, if you saw it?
- Is it really a trap?
White closed the trap?
White has played 30 Ra2.
Answers
So the Rook moved back to a2, apparently trapping Black’s Queen. But again, was it really a trap?
Black refuted the trap?
Black played 30…Rxd4.
You get credit if you saw this move taking White’s Knight on d4, and saw that White’s Queen is overloaded such that retaking the Rook in either one of two ways leads to losing back the Rook on c1 and therefore losing a piece overall and the game.
I was very proud of seeing this tactic. (If you saw a different move for Black, we’ll discuss that further down below.)
White refuted the refutation?
White played 31 Qc2.
When Melih moved his Queen to c2, I was in shock and disgust at myself: in my fatigue near the end of this game, and overexcitement at believing I had “refuted” a “trap”, I had completely failed to take into account that White was not actually required to take my Rook on d4!
Amusingly, it turns out that Melih, after playing 29 Rac2 setting the “trap”, saw to his horror the resource 30…Rxd4, and thought he was lost, but then saw 31 Qc2. So neither of us had originally seen this saving resource for White.
Questions
- Is Black’s Queen trapped for real now?
- What should Black do? Is Black lost? Or is Black still winning? Or should Black start looking for a draw?
Black panicked, trying to draw
Yes, Black’s Queen is trapped for real. You get credit if you saw that Black’s flashy 30…Rxd4 had this flaw.
The only question for me was how best to give up my Queen.
I chose poorly. In a daze, I could not think straight. I chose to give back a Rook with 31…Qxc3, in order to force a trade Queens on c3 and go into an endgame an exchange down for two Pawns, and hope for a draw.
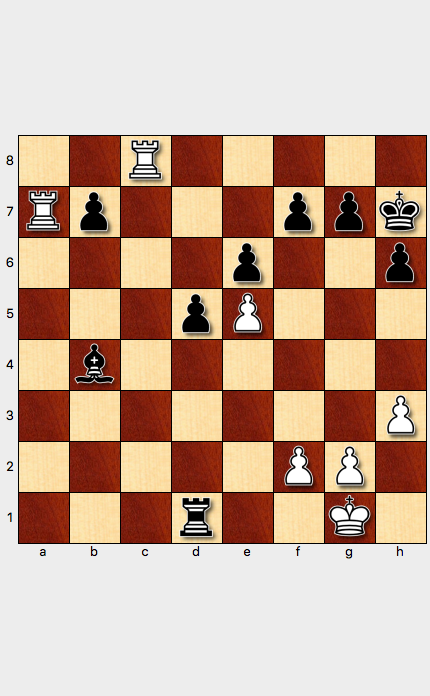
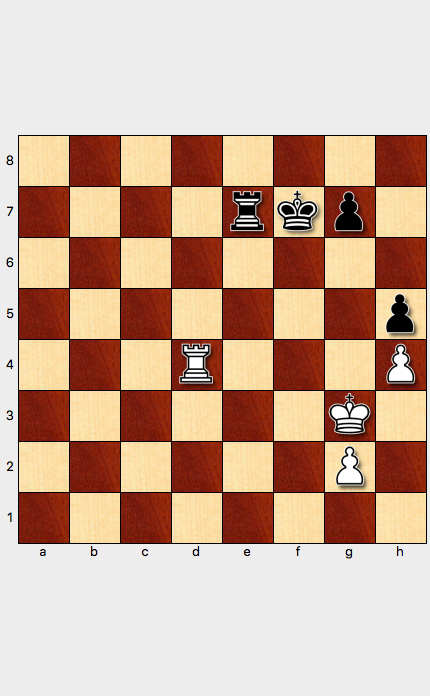
I was correct that the resulting position was objectively equal and drawable, but in a time scramble, it’s obviously easier to play White, and for the rest of the game, both sides made major errors (with White botching up winning positions and Black botching up drawn positions) until a simplified position was reached (Rook and two Pawns for each side) with only seconds left on the clock, and a draw agreed. I consider myself lucky to have drawn. The final position was:
But Black could have played to win
You get credit if you chose instead to sacrifice the Queen with 31…Qxc1+ to get the Rook and Bishop and Pawns against White’s Queen, with advantage and a good chance of winning. After 32 Qxc1 Bxb4, Black is about to win White’s c3 Pawn:
In fact, if you saw all this when thinking about whether to take the Pawn on a3 in the first place, then you get bonus points for seeing a way to an advantage through the sequence of tactical blows. Neither Melih nor I saw any of this up front, unfortunately.
I chickened out and did not take this continuation because after being shocked that my Queen was disappearing, I experienced a visceral fear that I needed to bring down White’s Queen also, else it with White’s Rook might be dangerous to my King.
It turns out that my fear was objectively unwarranted, as Black’s defenses are sufficient because of the power of the dark-squared Bishop to hit White’s e5 Pawn and even the f2 Pawn, but I was not thinking straight any more as time was running out for the four-hour game and it was already around 11 PM at night on a weekday.
One possible position
Here is a position that might have arisen if I had gone into this variation:
The thing is, even though the computer says Black has an advantage, it could be scary playing against White’s Queen.
Another possible position
But analysis also shows that White has to be very careful. For example, if White is greedy and wastes time taking Black’s a7 Pawn above, Black quickly gets a winning attack:
In time pressure, anything can happen, and I think it would have been very likely that White would have grabbed the a7 Pawn, after which Black’s position play itself.
Finally: Black’s real refutation!
I said you get extra credit for seeing everything to the point of sacrificing Black’s Queen for an advantage. But you only get full credit if you saw the real refutation of White’s “trap” earlier in the game! I kicked myself for not having seen it.
Questions
- Was there a point at which Black could have deviated and won the game outright?
- Hint: which of Black’s pieces have we not focused on in the variations covered so far?
Answers
Black could, after White “trapped” the Queen with 30 Ra2, used a different and better deflection of White’s overloaded Queen than 30…Rxd4, which was OK but not best.
We haven’t looked at Black’s Bishop enough. I only saw this upon recovering from the draw and analyzing the game later at home: the winning shot is 30…Bg5!

If White blocks the threat to the Queen with 31 f4, then Black just lops off the Pawn with 31…Bxf4 and now:
- if White takes the Bishop or otherwise moves the Queen, Black will win either the Rook on a2 or the Rook on c1
- if White takes Black’s Queen, then Black takes White’s Queen on d2 with tempo and will eventually win all three of White’s weak Pawns on dark squares (c3 followed by e5 and b4)
Either way, the endgame is an easy win for Black.
Neither Melih nor I saw this winning resource for Black during the game. We just weren’t looking at that quiet Bishop because it hadn’t participated in anything up till that point.
Conclusion
Chess never ceases to surprise me. Tactical possibilities are everywhere, and in this game, both Melih and I missed various possible continuations, playing moves thinking we knew what had to follow. I hope you enjoyed this story of missed opportunities and incomplete calculations.
My thanks to Melih for a challenging and fascinating game, and sharing his thoughts with me afterwards.
